

How To Pin And Weld Muzzle Device
In their perfect, all-knowing wisdom, the United States Congress in 1934 limited the legal length of a rifle barrel to no shorter than 16 inches. For barrels under 16 inches, the National Firearms Act requires gun owners to utilise for a special license and render unto Uncle Sam a $200 tax stamp.

This project isn't difficult every bit long every bit yous take admission to a welding car and someone who knows how to use information technology.
But the Human action includes a caveat. Barrels are measured from the breech confront to "the far-off end of the barrel or permanently fastened muzzle device." A barrel can be 14.v inches long, for example, provided a i.v-inch muzzle device is also permanently affixed.
Co-ordinate to the National Firearms Handbook, "Permanent methods of attachment include full-fusion gas or electric steel-seam welding, loftier-temperature (1100°F) argent soldering, or blind pinning with the pin caput welded over."

The Daniel Defence Extended Cage Climb Mitigator is a corking option for this projection. They offer the brake in 5.56 and .xxx caliber.
In my never-catastrophe quest to avoid the NFA licensing procedure, I opted in my almost contempo AR build to buy a 14.5 inch Ballistic Reward butt and pin/weld a 2 inch Daniel Defence force cage brake to the end of it.
It may non be the nigh practical pick (I merely saved about 2 inches of overall length), but I enjoyed the project and I think the barrel/restriction looks great with my 15 inch Rainer Artillery rails.
Footstep one: Choose your Muzzle Device
Keep 2 things in mind when choosing your cage device: barrel length and rail length. If you're using a muzzle restriction, pick one that both meets or exceeds the xvi inch marking and one that will clear your rail.
Equally the pin/weld selection is gaining popularity, many gun parts manufacturers offer brakes designed specifically for this purpose. Daniel Defense offers an extended version of their Muzzle Climb Mitigator to ensure the restriction holes will clear a 15 inch runway. I've too seen muzzle devices with a pre-drilled hole (more on that below).
You can also use other cage devices (wink suppressors, flash cans, etc.) that directly the nail forrard instead of upwards. In that example, your but concern will exist to meet the 16 inch barrel + brake requirement.
Step ii: Drill the Hole
Be patient on this step. Information technology takes fourth dimension.
For me, drilling the hole in the brake was the most time-consuming role of the process. This is a poor human'southward how-to guide (see title), which means I didn't have the fancy tools that are probably necessary for this job. Simply that's never stopped me before, and with the combination of a Dremel tool and a power drill I made it through eventually.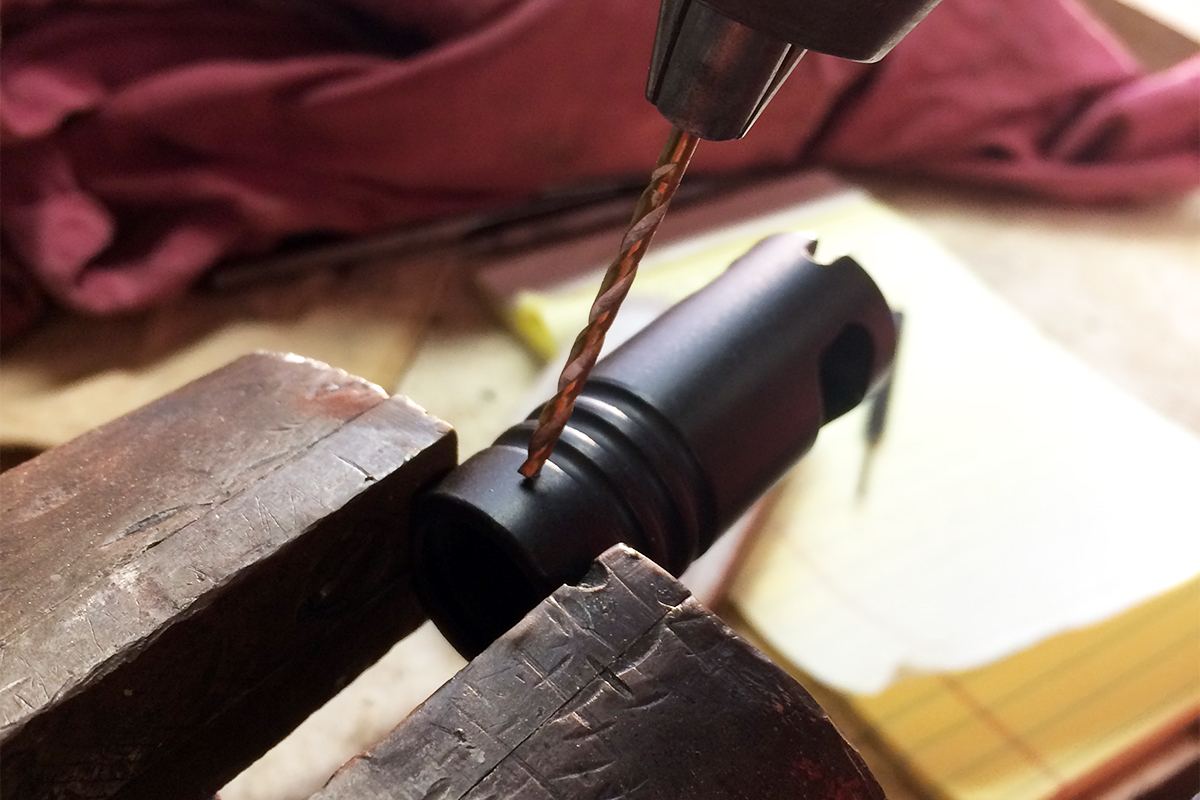
I opted to drill the hole earlier installing the muzzle device. There's a run a risk to this method, of course, and I nearly wasn't able to thread the brake onto the butt. But it was much easier to work with the brake pre-install, and I knew exactly when I'd drilled far plenty.
I chose the bit size based on the pin I planned to use. It doesn't accept to friction match perfectly. It simply needs to exist big enough for the pin to fit and small plenty to go on the pin upright.

Washed. Not the prettiest job in the world, but a fiddling touch on up paint will get a long way.
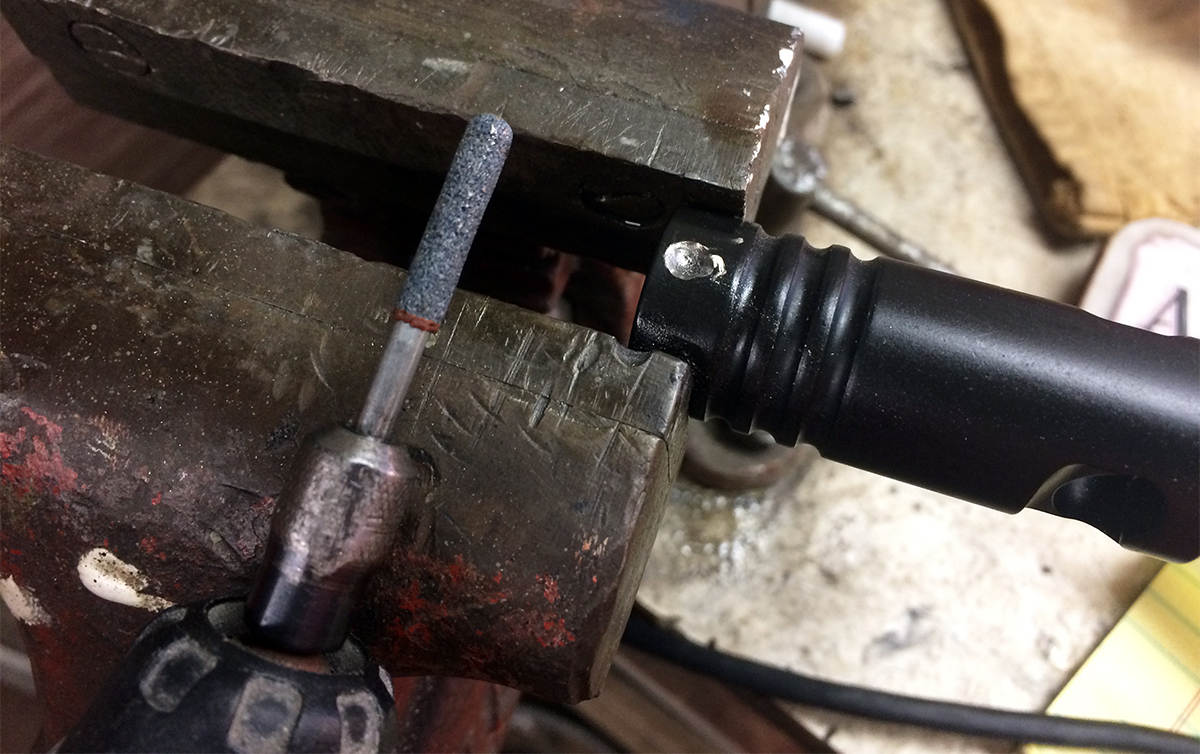
Step 3: Measure out and Cutting the Pin
A Dremel flake will cutting through easily plenty. I used a 3/32" steel punch.
I used the stop of a steel dial for my pin. I dropped the punch into the hole, marked the advisable length, and cut information technology with a Dremel tool.
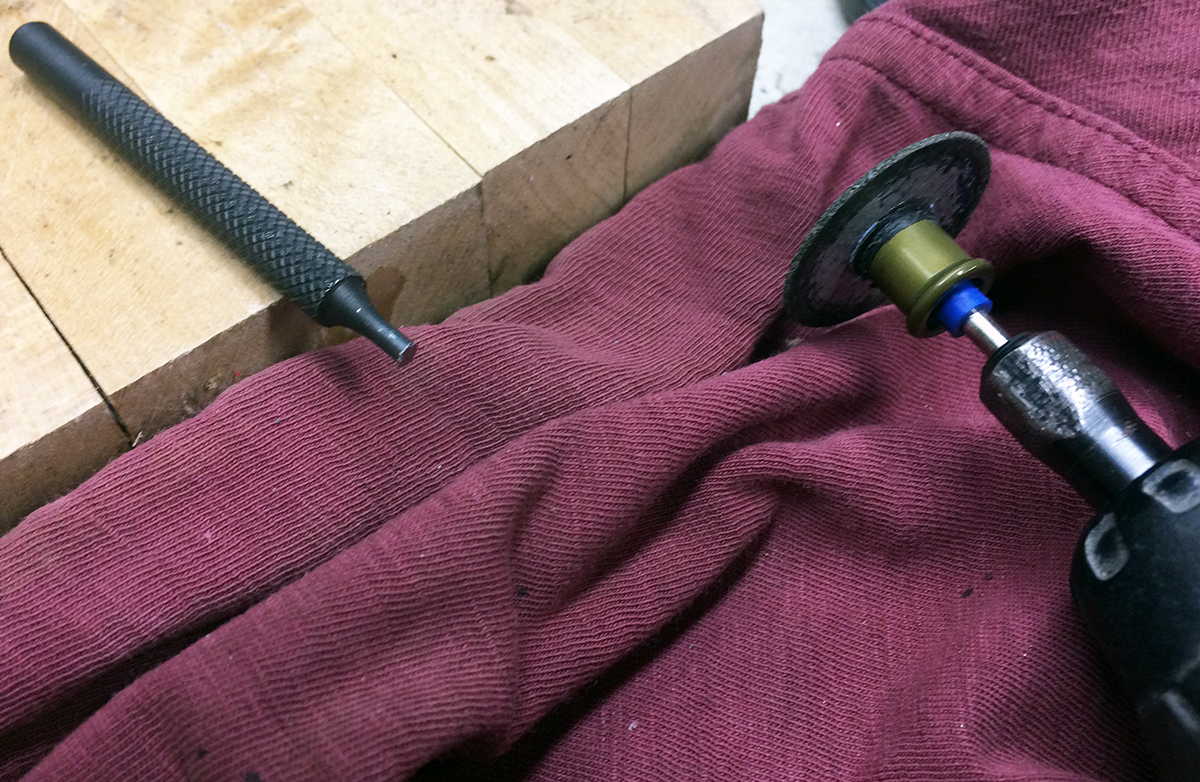
Step 4: Install the Pin
First, install your muzzle device like yous normally would.
The pivot needs to be seated into the butt threads and then that the restriction cannot be turned one time the weld covers the pin. For that, I returned to my drill/Dremel combination and cutting a small indent into the threads. Manifestly, you don't want to get carried away at this signal—drilling all the mode through would probable ruin the barrel.
Once you have a small-scale hole, simply tap the pivot into it until the pin is secure. Information technology's also helpful to round i side of the pivot and then it seats more firmly in the indent in the threads.
Pace 5: Weld the Pivot in Place
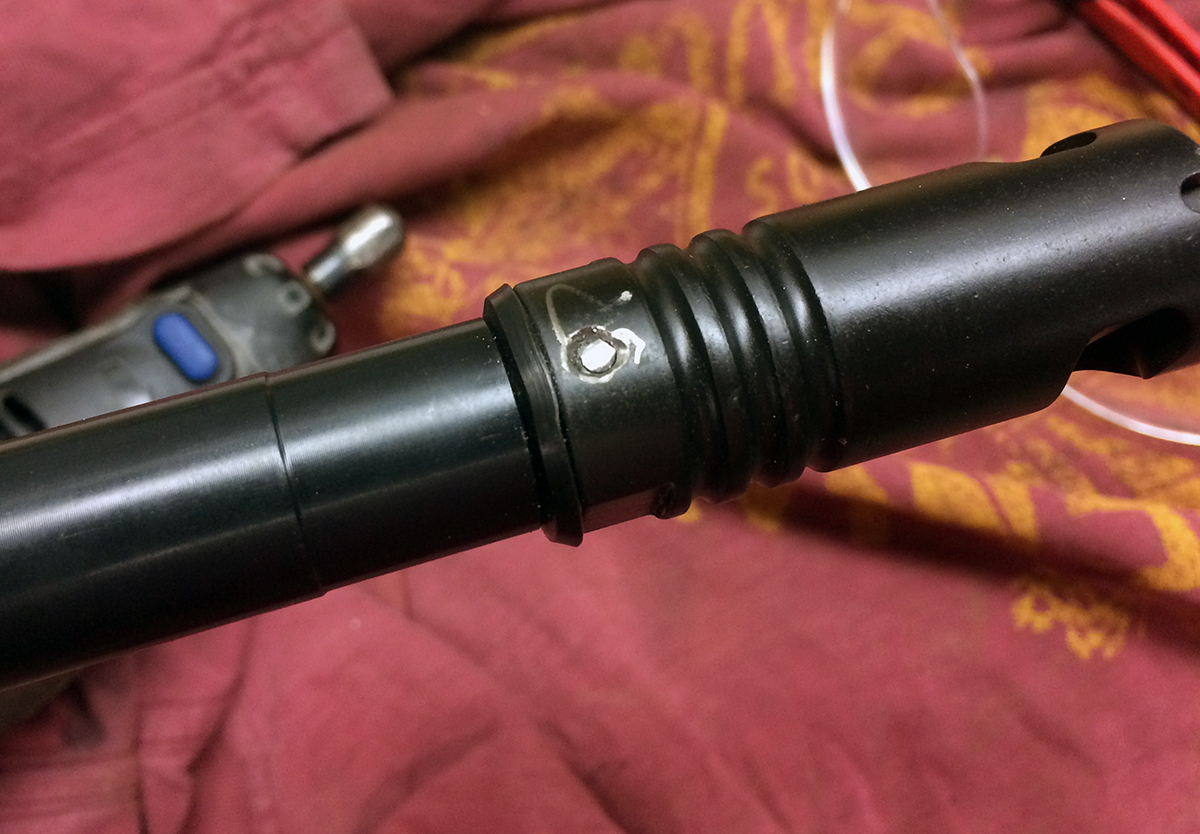 I don't know how to weld, but I know someone who does. He was kind enough to assist me out, and he had it washed in a matter of seconds.
I wanted to file down the bubble and paint over information technology, simply I decided against it. The weld should exist obvious, just in case the gun is ever inspected by government.

This is how we set the weld. Y'all may take to scrape a bit of paint off the cage device to get a adept connexion.
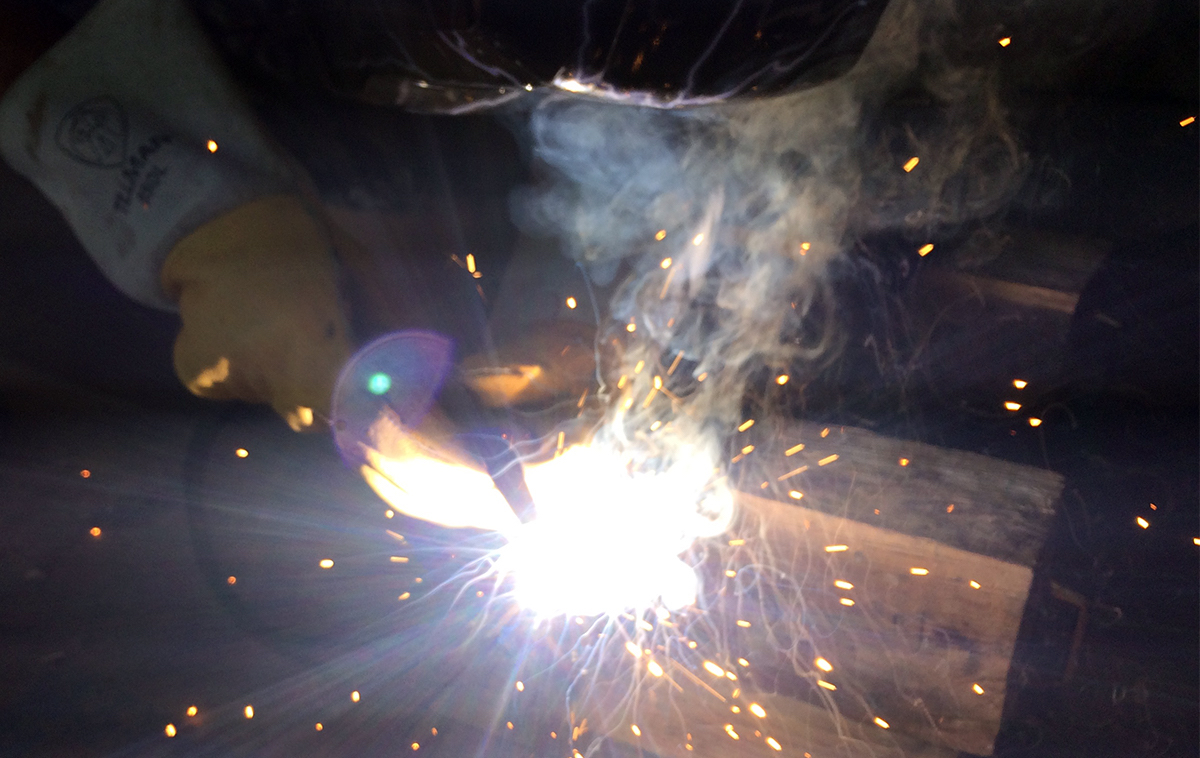
The weld didn't take any time at all.
Decision

The white specs brush off easily. After that, y'all tin can paint the bubble to match your brake and barrel.
I constitute pinning and welding my muzzle device to my barrel to be a relatively simple project. Drilling the pin pigsty was time-consuming but not difficult. And one time I cut a correctly sized pin, the weld was a piece of cake.
If you develop hives at the idea of marring your muzzle device, this projection probably isn't for y'all. As well, if y'all aren't 100% certain about your barrel/restriction configuration, pinning and welding isn't the way to get. Information technology is possible to remove the cage device, only y'all might non be able to salvage the threads on your barrel. "Permanently affixed" ways exactly that.
That being said, a little touch-upward pigment can make the weld most invisible, and I'one thousand confident that my muzzle device won't be also disruptive to my fellow shooters at the range.
If you used a different method, allow the states know near it in the comments!
![]() has been reviewing firearm-related products for over half dozen years and enjoying them for much longer. With family in Canada, he's seen first hand how quickly the correct to self-defense force tin can be stripped from law-abiding citizens. He escaped that statist paradise at a young age, married a sixth-generation Texan, and currently lives in Tyler. Got a hot tip? Send him an electronic mail at hashemite kingdom of jordan@gunsamerica.com.
has been reviewing firearm-related products for over half dozen years and enjoying them for much longer. With family in Canada, he's seen first hand how quickly the correct to self-defense force tin can be stripped from law-abiding citizens. He escaped that statist paradise at a young age, married a sixth-generation Texan, and currently lives in Tyler. Got a hot tip? Send him an electronic mail at hashemite kingdom of jordan@gunsamerica.com.
Source: https://www.gunsamerica.com/digest/diy-pin-weld-muzzle-brake/
0 Response to "How To Pin And Weld Muzzle Device"
Post a Comment